Improve the 3D Ender3 printer Free Tutorial.
Find out how to improve the performance of the 3D cr-10 or Ender3 printer (PRO/V2) with a direct extrusion system. Full guide.
If you own a Creality CR-10, CR-10S, CR-10 Mini or Ender-3 (any version up to V2), this advanced modification can revolutionize the quality of your 3D prints. Wade Direct Extrusion Conversion, represents the ultimate upgrade for:
Dramatically improve print quality.
Almost completely eliminate annoying hotend blockages.
Achieve more precise and consistent extrusion.
Print more demanding materials such as TPU with greater ease
The advantages of the Wade system definitely outweigh some small limitations of this technology, due to a small increase in the weight of the extrusion system. To limit weight, we can optionally replace the original Nema 17 engine, with a more compact and lighter one like the Nema 14.
Pros and Cons of the two remote and direct extrusion modes.
The substantial difference between the two extrusion systems concerns the positioning of the Nema motor in the 3D printer.
Bowden Direct Extrusion System:
While in the Wade system the motor is positioned directly above the hotend moving in a solidary way with the trolley, The Bowden remote system, on the other hand, is mounted separately at a fixed point on the 3D printer, So the filament arrives at the hotend with a fairly long path through a Teflon tube.
The main advantage of the Bowden is the low inertia of movement of the extruder along the x-axis. This characteristic becomes all the more important when the extruder makes fast movements subject to significant accelerations and decelerations. While the most negative aspect of this approach concerns the need to apply a higher force to achieve extrusion. This is due to the considerable distance with the hotend, in fact, a part of the thrust that the filament receives from the driver is lost along the sheath.
However, this technique allows us to significantly lighten the carriage allowing us to make faster and at the same time relatively more precise prints. In fact, since the motor and the extrusion driver are mounted in a remote position outside the carriage, the latter will have a very low weight and consequently its small inertia will allow it to move faster and more precisely.
The "Wade" direct extrusion system
The Wade being directly connected to the hotend and then mounted on top of the cart, it has greater weight and inertia. However, practical tests have shown that the weight obtained does not represent a serious limitation for printing.
The main disadvantage of an extruder is precisely the fact that the greater weight increases inertia on acceleration and deceleration. Instead, on its side we have that all the energy will be transmitted to the filament which will thus be able to escape with more force in the hotend.
In addition, the Wade system can be further improved by reducing its overall weight and consequently also inertia. In essence, it will be enough to replace the original Nema17 engine with a more compact and lighter one like the Nema14.
Technical comparison between the direct and remote extrusion system.
Direct Extrusion vs Bowden: Advantages and Disadvantages:
The Bowden system, fitted as standard on these Creality 3D printers, it generally has some limitations:
Bowden Problems:
Loss of extrusion accuracy due to distance from the hotend
Increased likelihood of blockages and under-extrusion
Limitations with flexible materials
- Long retraction length to limit blogging phenomena
Benefits of Wade (Direct extrusion):
Direct and immediate filament control
More powerful and precise extrusion
Full compatibility with all materials, including hoses
Reduction of retraction problems as the same minimal
Installation Guide for the Direct Extrusion system
How to Convert Your CR-10/Ender3 to Direct Extraction
Materials Needed:
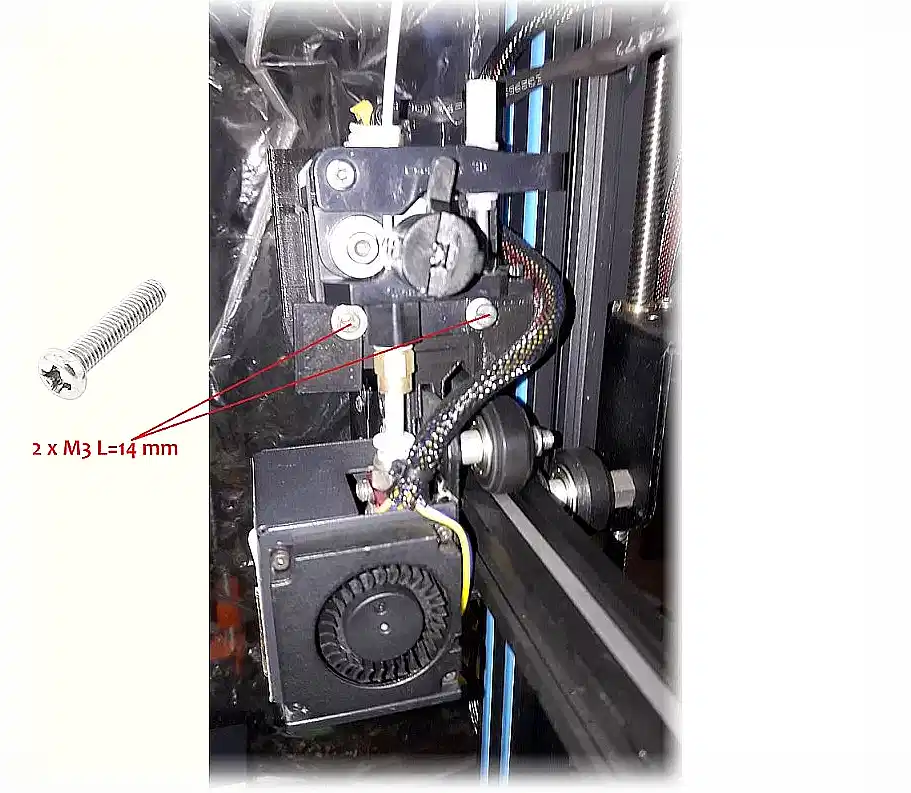
- 2 x M3 screws 14mm long
- 4 x M3 screws 40mm long
- 2 x 3mm long M3 self-tapping screws.
Hex and Phillips screwdrivers.
NEMA14 motor possible to reduce weight (optional).
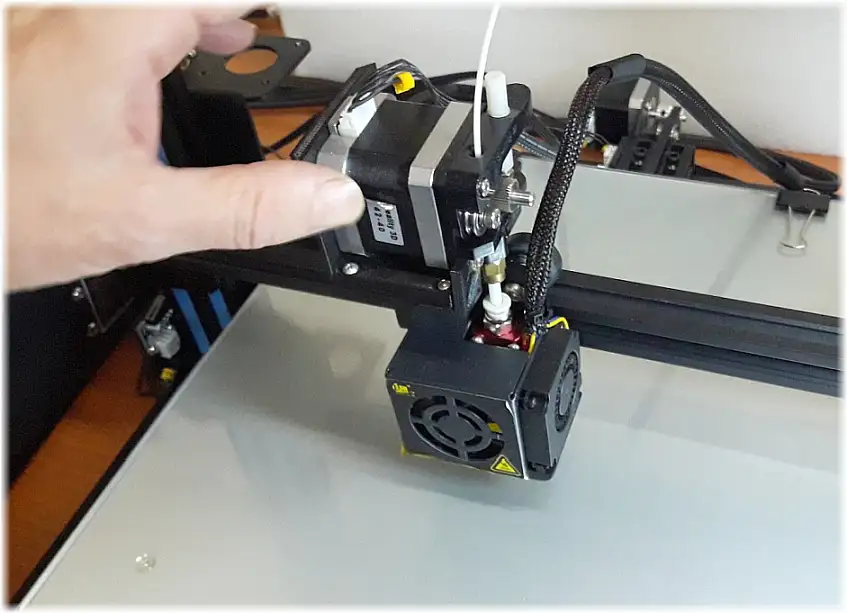
Step 1: Dismantling original components
Remove the original extrusion drive by unscrewing the 4 screws.
Disconnect the Filament End Sensor.
Remove the NEMA17 motor from the backplate.
Step 2: Preparing the new system
- Get 2 M3 self-tapping screws about 3mm long and another 4 M3 screws 40mm long.
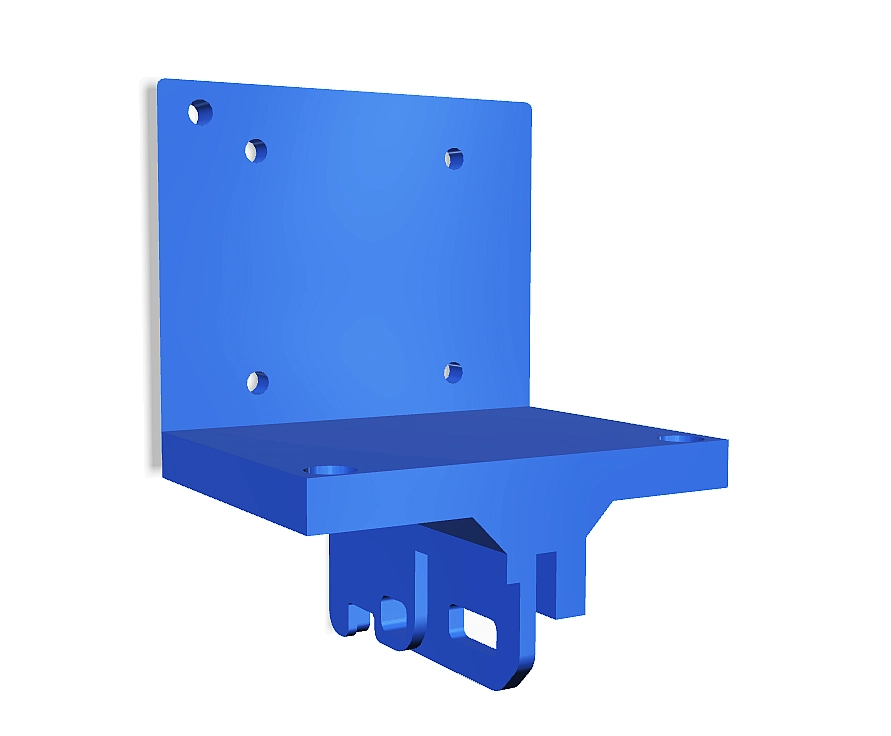
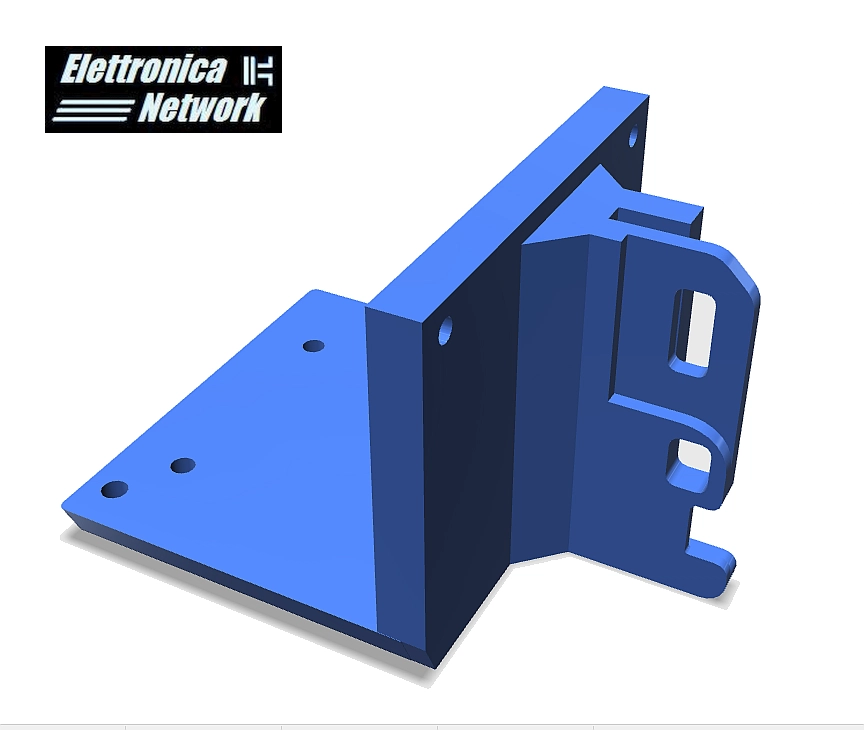
- Have the 2 new grab brackets and the Nema 17 motor you just removed from its original position handy.
- Remove the 4 rear studs of the motor and after repositioning it over bracket No.1, secure it using the new M3 40mm screws.
- Match the rear side of the motor with the inner face of the same bracket and at the same time make the holes of the same coincide with those of the engine studs.
- Make sure all components are well aligned before tightening the screws.
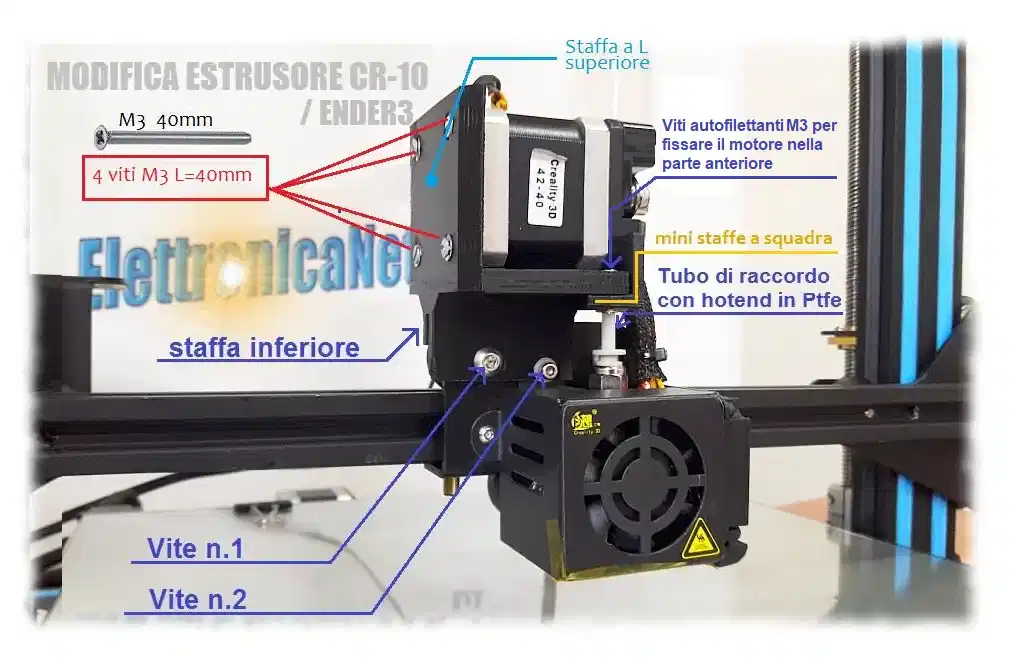
Step 3: Installation on the trolley.
- Now place the bracket assembly, motor and extrusion driver above the CR-10 print carriage, fixing it on the same using the two hexagonal head screws as shown in the photo below. The first on the left (1), is the one that secures the scroll wheel to the left of the print carriage. On the other hand, the second (2) it is the one that locks the box that supports the cooling fan in the same cart.
- Plug in the power connector and verify that the movement on the X-axis is smooth

Calibration Tips
Optimizing Performance After Editing
Recalibrating the extruder offset: you can use a common sheet of A4 paper to adjust the distance of the extruder from the print bed
Reduce initial print speed: Start printing small objects with 40-50mm/s to test the new extrusion system
Optimize retraction settings: Test with small values between 1-2mm, You'll notice that they're now more than enough to ensure quality prints.
Check the belt tension: It must be well taut but not excessive
Make a first print to test the direct extrusion system.
Preheat the extruder and load the plastic filament by pushing down the drive gear pull lever down. Slide down the filament to the end of the filament’ hotend and therefore is close to being extruded. At this point, level the plate and start a test print to convey the results of the change made in practice.
One last piece of advice, To further improve print quality, You can replace the original brass filament drive gear with our special gear, which compared to the original boasts a much more effective grip.
This is made of carbon steel and is equipped with long, sharp-profiled slats. This drastically reduces the risk of filament slippage and ensures a more homogeneous and vigorous extrusion during printing.
Frequently asked questions
Answers to the Main Doubts about this Modding.
Q: I will lose my warranty with this change?
R: Unfortunately, yes, unauthorized hardware interventions void the warranty.
Q: Can I go back to the original configuration?
R: Absolutely yes, Retains original components for possible restoration.
Q: Which materials benefit most?
R: TPU, PETG and composites will see the most noticeable improvement.
Conclusion
Why This Change Is Worth It
Converting your CR-10 or Ender3 to direct extrusion is the most effective upgrade for:
Solving under-extrusion problems
Print advanced materials with ease
Achieve more accurate and consistent prints
Reduce maintenance and lockouts.
Next steps:
- Download to Thingiverse Oh with Printables The STL files for 3D printing of the engine support and the brackets needed to fix it on the front.
- Or aquista our brackets already printed you find them at a reasonable cost in ours Online shopping in 3D printing.
Contact us to request quotes and personalized assistance.
This project is granted under license:
Creative Commons (4.0 International License)
Attribution—Noncommercial—No Derivatives