We Improve CR-10 and Ender3 3D Printers
If you are passionate about 3D printing and maybe you own or intend to buy one or more of these 3d printers: Creality CR-10, CR-10S, CR-10 Mini, CR-10 Ender-3 (first version or V2), this certainly is “edit” that suits you. In essence, this is a simple update that will surely significantly improve the print quality and reliability of your Creality printer.
We customize the CR-10 with an effective direct extrusion Wade system.
The following question will arise spontaneously: What would essentially be the advantages of returning to the use of the traditional direct drive system “wade”, although today almost all 3d printers have left out this ?.
The answer is the decisive improvement in the print quality and reliability of the 3D printer itself. In essence, the advantages of the Wide system consist in a much more homogeneous extrusion and also almost completely eliminates the possibility of incurring annoying hotend blocks.
In my opinion, the aforementioned advantages definitely outweigh some small limitations of this technology which, on the other hand, are easily solvable . Nonetheless, it is evident that today the most used extrusion system in 3D printers remains and inexplicably the “Bowden”.
Let's see what are essentially the Pros and Cons of the two extrusion modes in the CR-10.
The substantial difference between the two extrusion systems concerns their positioning in the 3d printer. The Wade is placed on top of the hotend and consequently moves with the cart. The Bowden instead is mounted separately in another point of the same printer, therefore the filament arrives at the hotend with a long path through a small Teflon tube.
The main advantage of the Bowden is the low inertia of the extruder movement along the x axis. This feature becomes all the more important when the extruder is made to perform fast movements subject to important accelerations and decelerations.
The most serious criticalities of the Bowden extrusion system
In the case of the bowden system the most negative aspect of this approach concerns the need to apply a higher force to obtain the extrusion. This is precisely due to the considerable distance with the hotend, in fact, part of the thrust that the filament receives from the driver is lost along the sheath. However this technique allows us to significantly lighten the trolley allowing us to make prints faster and at the same time relatively more precise. In fact as the motor and extrusion driver are mounted in a remote position outside the carriage, the latter will have a very low weight and consequently its small inertia will allow it to move faster and more precisely.
The direct extrusion system “Wade”
The Wade being directly connected to the hotend and then mounted on top of the cart, it has a greater weight and inertia. However, from the practical tests we have carried out it has emerged that the weight obtained does not represent a serious limitation for printing.
The main disadvantage of an extruder is given precisely by the fact that the greater weight increases the inertia on accelerations and decelerations. Instead on his side we have that all the energy will be transmitted to the filament which will thus be able to escape with more force into the hotend.
Furthermore, the Wade system can be further improved by reducing its overall weight and consequently also the inertia. Basically it will be enough to replace the original Nema17 motor with a more compact and lighter one like the Nema14.
We reposition the motor directly above the extruder in the CR-10 3d printer.
- Buy the new ones support brackets for CR10 for the reassembly of the engine in the new direct extrusion Wade configuration
- Disassemble the original extrusion drive by unscrewing the 4 screws that secure it to the front part of the motor and at the same time also remove the filament end sensor
- Disconnect the connector that powers the original Nema14 motor and then remove it from the support plate by unscrewing the same 4 screws that also connect it to the extrusion driver.
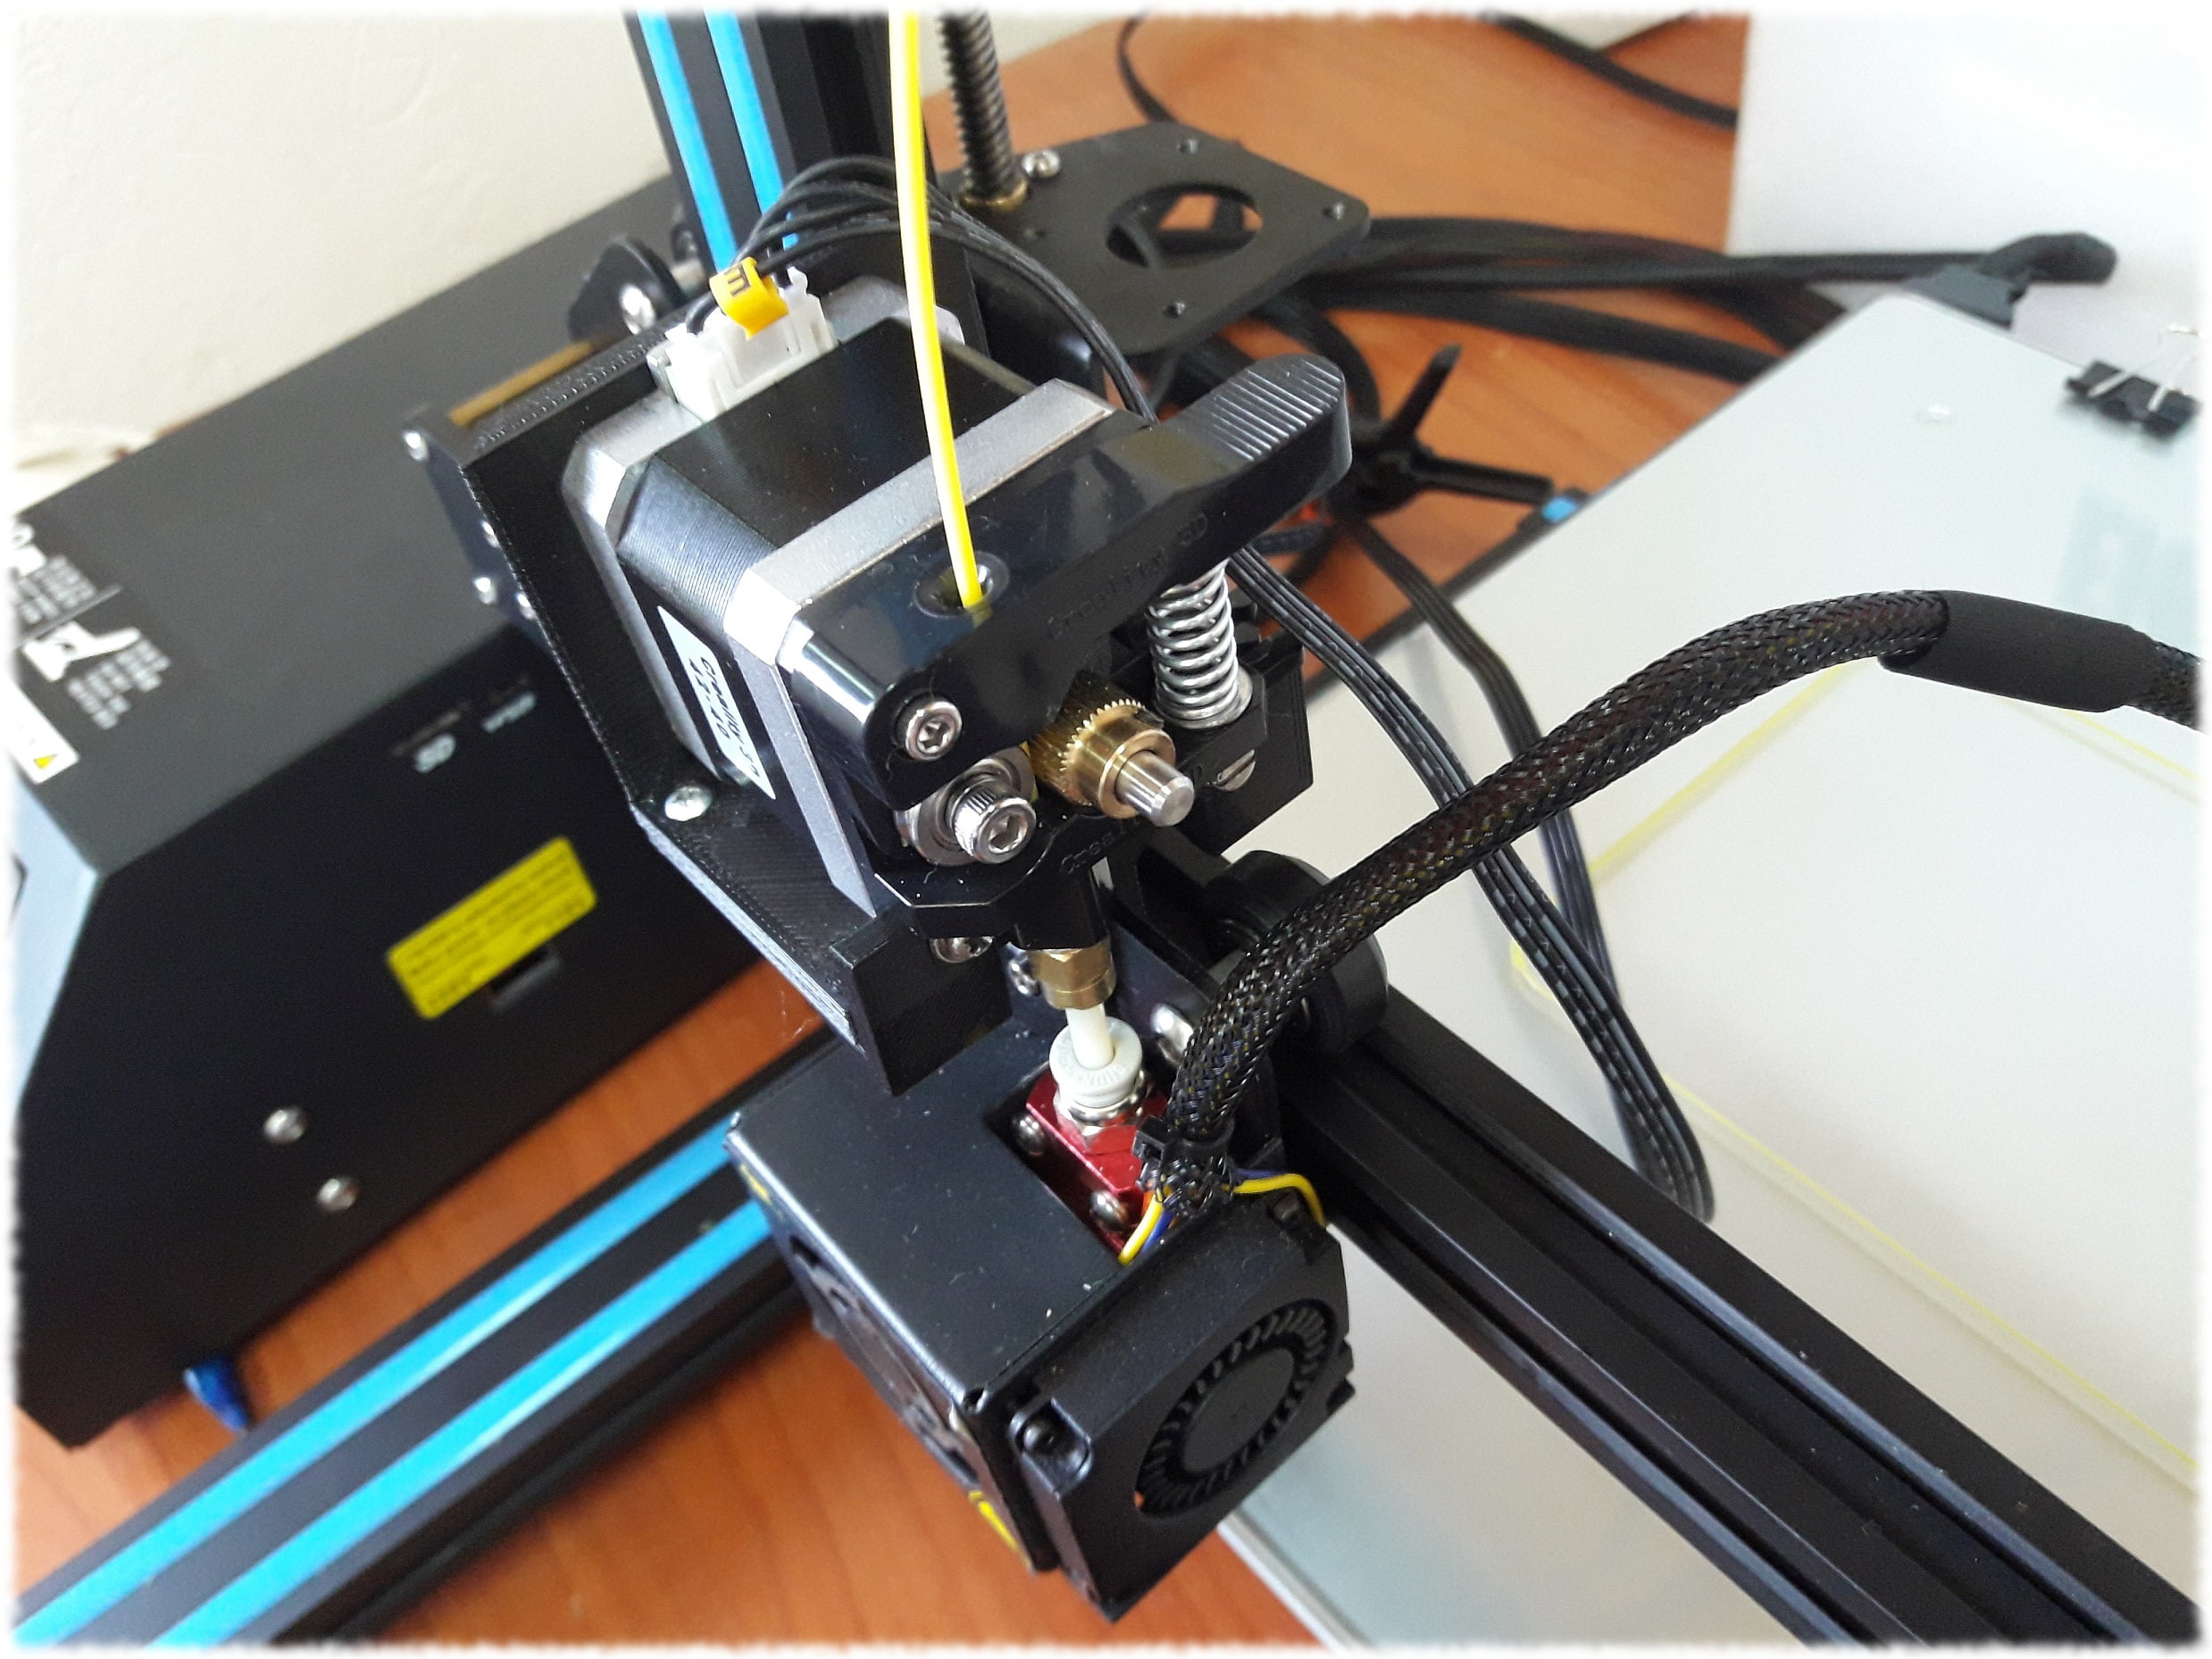
- Keep the 2 new support brackets handy, in particular now you will need the one in the shape of a team. Take the Nema motor, remove the 4 rear studs and then position it over bracket no. 1 using the same screws again. You will have to match its rear side with the internal face of the same bracket and at the same time make its holes coincide with those of the engine studs.
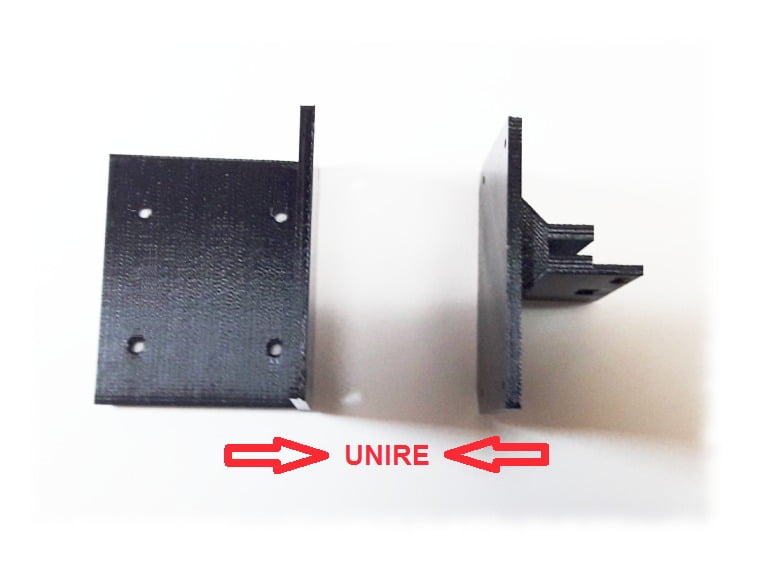
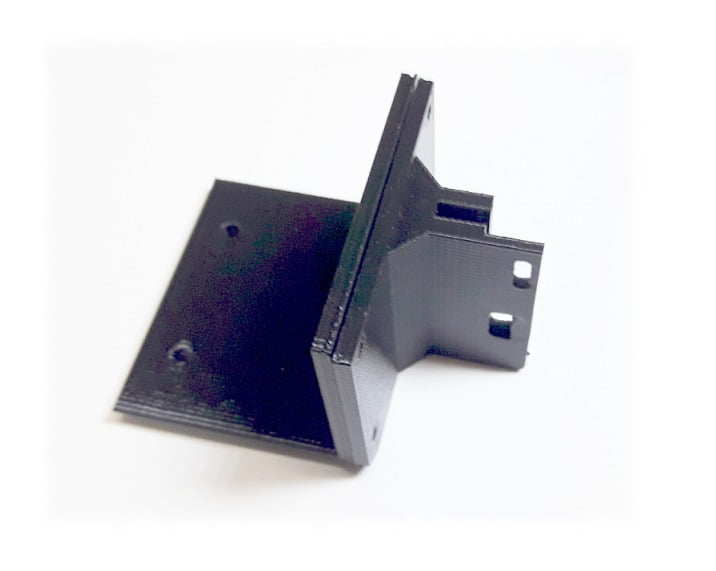
- Now join the two upper support brackets (1) and lower (2), to form a single body using 4 self-tapping screws to lock them as shown in the following images.
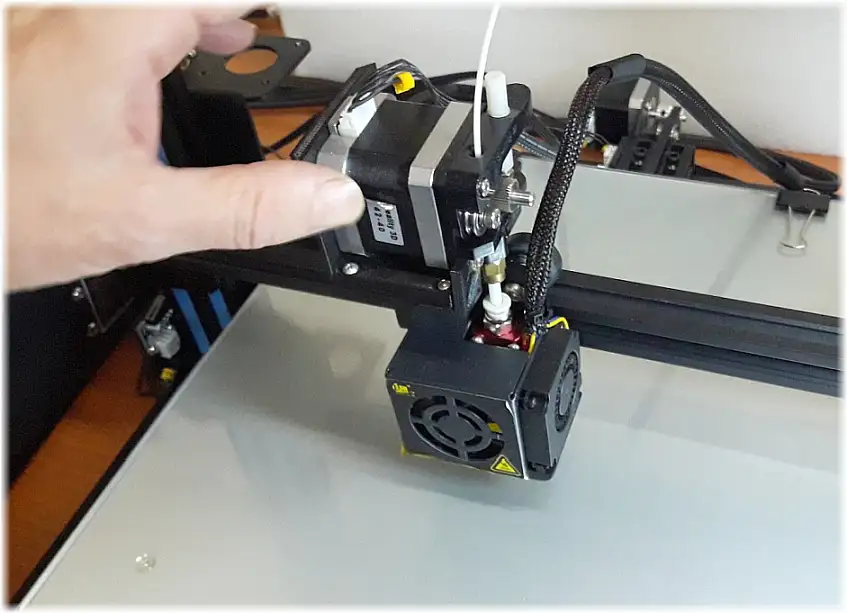
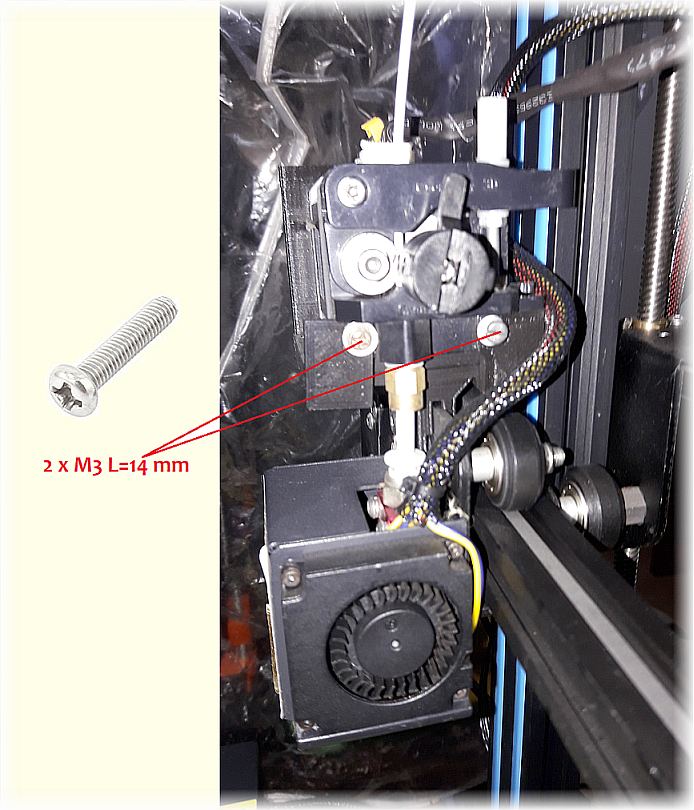
Now place the bracket group, motor and extrusion driver on the CR-10 print carriage, fixing it on the same using the two hexagonal head screws as shown in the photo below. The first on the left (1), it's the one that fixes the scroll wheel to the left of the print carriage. Instead the second (2) it is the one that blocks the box that supports the cooling fan in the same trolley.

Once you have tightened screws 1 and 2 well, all you have to do is reconnect the power connector of the nema17 motor.
We are ready for a test print with the new extruder
Preheat the extruder and load the plastic filament by pushing down the drive gear removal lever. Slide the filament down to the end of the’ hotend and therefore is close to being extruded. At this point, level the plate and start a test print to verify the results of the modification made in practice.
To further improve the print quality, I advise you to replace the original brass gear for dragging the filament. You can easily replace it with our special gear, which compared to the original boasts a much more effective grip. This is made of carbon steel and equipped with long blades with a sharp profile. This drastically reduces the risk of slippage of the filament and guarantees a more homogeneous and vigorous extrusion during printing.
Later I will write a new article that will explain how to improve the extrusion driver by eliminating the spring that pushes the filament drive gear. The resulting benefits are not negligible…. Stay tuned.
Maurizio Licciardò
Cell.333 7602601